
Happy Days beginner knitted sweater has minimum shaping and it’s a great sweater if you are a beginner and you’ve decided to knit your first sweater. The pattern only uses the knit and the purl stitches and it doesn’t use the decrease or increase techniques. So don’t give up if it doesn’t look good the first time, or the second, we all have been there! Just take that needles and practice every day if you can and you’ll become so good that even you won’t believe it! You can do it and you can be good at it!
Happy Days beginner knitted sweater it’s a versatile knitted jumper, the simple look is very stylish so it will make a great garment for your wardrobe.
Follow my Instagram page to see my latest projects.
For the Happy Days beginner knitted sweater, I’ve used 500 g of the Classic Wool Worsted(100g= 170m/ 3.53oz= 185 yards), 6mm needles, and 5 mm needles for the ribbing.
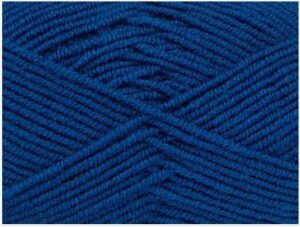
This classic wool worsted combination of wool and acrylic gives you the best qualities from both fibers. The yarn consists of 25% wool and 75% acrylic, making it easy to work with and, secondly, ensuring that your projects will be nice and warm to wear. The wool makes the yarn breathable, as is common with natural fibers, while the acrylic grants the yarn an incredible color depth and makes the yarn durable. The result is a warm and wonderfully soft yarn that’s easy to knit. And the colors will stay beautiful year after year. This yarn can be used for almost any type of clothing – e.g. sweaters, cardigans, ponchos, and, naturally, a wealth of different accessories and interiors. You can buy this great yarn HERE.
Abbreviations:
K= knit;
P= purl;
st= stitch;
RS= right side;
WS= the wrong side.
If you like to support my work as a crochet& knit designer and support me to providing more free patterns and designs, buy me a cup of coffee:

The printable version is for purchase HERE.
The printable version has the written instructions and the charts for the sizes XS; S; M; L; and XL.
The gauge for the stitch for 10 x 10 cm (4 x 4 inches) after washing and blocking: 15 stitches and 22 rows.
The final dimensions of my sweater: are 47 cm/ 18.5 inches in width (94 cm/ 37 inches circumference) and 55 cm/ 22 inches long.

The instructions for the Happy Days beginner knitted sweater:
The ribbing:
For my sweater, I’ve used the seeded rib.
Cast on multiple of 4 sts plus 1 using the 5mm needles, for my sweater, I have 73 stitches.
1.Row 1: p1, *k3, p1*, repeat *-* to end;
2. Row 2: k2, p1, *k3, p1*, rep *-* to the last 2 sts, k2.
Repeat the pattern from row 1 until you have 12 rows.
The chart (click on the chart for a better resolution):

The video tutorial for the seeded rib:
The video tutorial for the stockinette stitch:
The back panel for the Happy Days knitted sweater:
Change for the 6 mm needles and continue to knit the back panel of the sweater:
13. Row 13: knit all stitches;
14. Row 14: purl all stitches;
Repeat the pattern from row 13 until you have in total of 112 rows (12 ribbing rows plus 100 stockinette rows).
The neckline and shoulders:
The chart (click on the chart for a better resolution) :

Starting with the next row we will knit every shoulder at a time.
First shoulder:
113. Row 113: knit the first 23 stitches; place a stitch marker.
114. Row 114: turn and purl all 23 stitches (to the stitch marker until the end of the row).
115-122. Rows 115-122: repeat rows 113-114.
Bind off, secure the last stitch, and weave in.
The second shoulder:
Transfer the first 27 stitches (these sts will be a part of the neckband) on the 5 mm needles and continue to knit the second shoulder as the first one.
The front panel:
Cast on 73 stitches and knit the front panel exactly like the back panel until you have in total of 102 rows (12 ribbing rows plus 90 stockinette rows).
The neckline and shoulders:
The chart (click on the chart for a better resolution):

Starting with the next row we will knit every shoulder at a time.
First shoulder:
103. Row 103: knit the first 23 stitches; place a stitch marker.
104. Row 104: turn and purl all 23 stitches (to the stitch marker until the end of the row).
105-122. Rows 105-122: repeat rows 103-104.
Bind off, secure the last stitch, and weave in.
The second shoulder:
Transfer the first 27 stitches (these sts will be a part of the neckband) on the 5 mm needles and continue to knit the second shoulder as the first one.
Sew together the front and back panels leaving enough space for the sleeves (I have 20.5 cm/ 8 inches). Then sew together the shoulders too. You can sew them together using the stitch you know how to sew, I’ve used the mattress stitch.
The neckband:
Pick up the stitches directly from the neckline of the sweater making sure you have multiple of 4 sts plus 1 stitch using the 5mm needles.
With RS facing and using a 5 mm circular needle, pick up the stitches. I like to pick up the first stitch from the joining line of the left shoulders and continue to pick up the stitches down the left side of the front neck. Knit the stitches on the stitch holder (27 stitches) when you reach them. Continue to pick up stitches on the right side of the front neck, and knit across the stitches on the back panel stitch holder (27 stitches). I have in total 101 stitches for the neckband.
Continue to knit the neckband using the seeded rib for 14 rows. Start to count the rows for the neckband when you start to knit the seeded rib.
Bind off, secure the last stitch and sew together the edges of the neckband, and weave in.

The sleeves:
Both sleeves are knitted identically.
Cast on multiple of 4 sts plus 1 using the 5mm needles, for my sleeve, I have 53 stitches.
1.Row 1: p1, *k3, p1*, repeat *-* to end;
2. Row 2: k2, p1, *k3, p1*, rep *-* to the last 2 sts, k2.
Repeat the pattern from row 1 until you have 14 rows.
Change for the 6 mm needles and continue to knit the sleeve of the sweater:
15. Row 15: knit all stitches;
16. Row 16: purl all stitches;
Repeat the pattern from row 15 until you have in total of 88 rows (14 ribbing rows plus 74 stockinette rows).
Bind off, secure the last stitch, and sew the sleeves on the body of the sweater. I’ve used the mattress stitch.
The dimensions of my sleeves are 46 cm/ 18 inches long and 35 cm/approx 14 inches wide.
Here are some great patterns for you to knit this season:
- Lily of the Valley knitted sweater;
- Autumn leaves knitted sweater;
- Knitted balaclava;
- Lace knit scarf;
- Herringbone infinity scarf.
I hope you enjoyed making the Happy Days beginner knitted sweater and I can’t wait to see your sweaters. Also, feel free to tag me when you share your project on Instagram or Facebook, or you can use the hashtag #turquoisewithvanilla.
Follow my Facebook and Instagram pages to see my current projects.
Also please Subscribe to my YouTube channel for my video tutorials: https://www.youtube.com/channel/UCUpzoP-RDaJV1_2kvJMh5QQ/videos

*Some links may be affiliate links, allowing me to make a small commission on any products purchased through my recommendation. Please note that this does not influence my opinion or recommendations in any way.


Foarte fain modelul acestui pulover pentru incepatori, Happy Days beginner knitted sweater! Este simplu de realizat, cu putine forme de croiala si foloseste doar ochiurile tricotate si ochiurile incrucisate. Atunci cand incepi sa tricotezi, s-ar putea sa nu arate perfect de prima data, sau chiar si a doua oara, dar nu te descuraja! Cu putina practica si rabdare, veti deveni atat de buni incat nu veti putea crede! Puloverul este versatil si poate fi purtat in orice garderoba, iar lana de calitate il face confortabil si calduros. Si culorile vor ramane frumoase si dupa mai multe purtari. Intr-adevar, un proiect excelent pentru oricine incepe sa tricoteze. Multumim pentru modelele tale minunate si te sustinem in munca ta prin achizitionarea unui model printabil sau prin donatii. Cu siguranta voi incerca acest proiect si ii voi spune si prietenelor mele despre el!
[…] Happy Days knitted sweater; […]