
The Flower Bud crochet top is the perfect pattern if you want to make a crochet top for the end of the summer or the beginning of the fall. The textured lace is a very simple crochet pattern stitch and looks very beautiful too. If you want to crochet this top in plus size, the pattern is very easy to adjust for your size.
If you’re looking at how to crochet tops for women, this simple crochet pattern is perfect even if you are a beginner. This free crochet easy pattern it’s perfect even if this is your first garment. The pattern only uses three stitches: single crochet, double crochet, and half double crochet. So if you are just learning how to crochet a top this one has to be on your list!
The final dimensions of the Flower bud crochet top are 44 cm/17.3 inches width (88cm/34.6 inches bust circumference) and 46 cm/18 inches long.
Gauge: 24 chains and 11 rows to 10 x 10 cm (4 x 4 inches).
For my Flower Bud crochet top, I’ve used almost 350 g Pure cotton fine (7 x 50 g) (50g= 170m/ 1.76oz= 185 yards) and a 3,5 mm crochet hook.
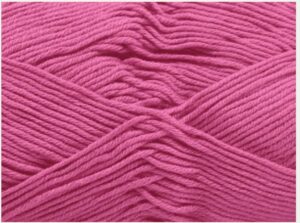
This is a very high-quality cotton yarn.
This yarn is made from 100% combed Turkish cotton, which is soft, flexible, and exceptionally durable. Textiles in Turkish cotton stay beautiful for many years and only get softer with use. This yarn also excels when it comes to its absorbing powers, but is quick-drying at the same time.
The color chart includes plenty of gorgeous colors so you just have to decide what color you like and get started. You can buy this yarn HERE.
If you like to support my work as a crochet designer and support me to providing more free patterns and designs, buy me a cup of coffee:

Pattern Instructions for the Flower Bud Crochet Top:
ABBREVIATIONS:
ch= chain;
st= stitch;
sl. st= slip stitch;
sc= single crochet;
dc= double crochet;
hdc= half double crochet;
3 dc cluster= 3 double crochet cluster;
The pattern uses US crochet terminology.

The chart for the stitch:
Make multiple of 6 chains plus 3.

The written instructions for the Flower Bud crochet Top:
Start with multiple of 6 chains plus 3; for my top, I’ve started with 99 chains.
1. Row 1: dc in the third chain from the hook, skip 2 chains and crochet: dc, ch, dc in the same chain; *skip 2 chains and crochet: 3 dc cluster, ch, 3 dc cluster in the same chain; skip 2 chains and crochet: dc, ch, dc in the same chain*. Repeat *-* until the end of the row and crochet 2 dc in the last chain.
2. Row 2: ch 2 (count as a dc), dc in the same stitch; in the next ch space crochet: 3 dc cluster, ch, 3 dc cluster. *In next ch space crochet: dc, ch, dc; in next ch space crochet: 3 dc cluster, ch, 3 dc cluster*. Repeat *-* until the end of the row and crochet 2 dc in the last stitch of the row.
3. Row 3: ch 2 (count as a dc), dc in the same stitch; in the next ch space crochet: dc, ch, dc. *In next ch space crochet: 3 dc cluster, ch, 3 dc cluster; in next ch space crochet: dc, ch, dc*; Repeat *-* until the end of the row and crochet 2 dc in the last stitch of the row.
Repeat the pattern from row 2 until you reach the desired length.
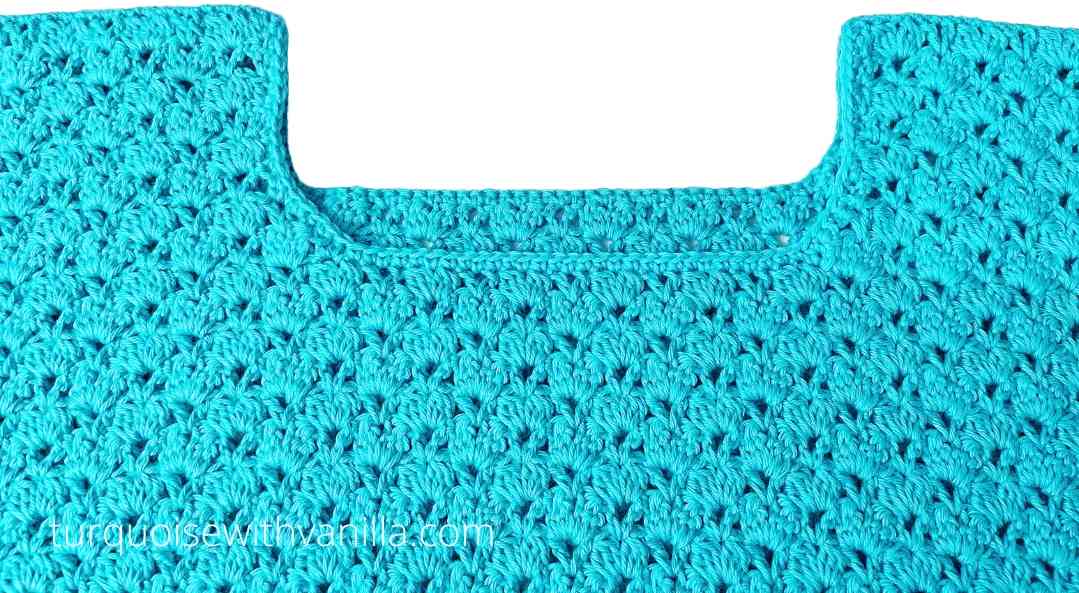
The neckline and the shoulders:
The back panel:
The chart for the back (click on the photo for a better resolution):

First shoulder:
1. Row 1: ch 2 (count as a dc), dc in the same stitch; in next ch space crochet: dc, ch, dc. *In next ch space crochet: 3 dc cluster, ch, 3 dc cluster; in next ch space crochet: dc, ch, dc*; Repeat *-* 3 more times; crochet 2 dc in next stitch (the next 3 dc cluster) not in the next ch space.
2. Row 2: ch 2 (count as a dc), dc in the same stitch; in next ch space crochet: 3 dc cluster, ch, 3 dc cluster. *In the next ch space crochet: dc, ch, dc; in the next ch space crochet: 3 dc cluster, ch, 3 dc cluster*. Repeat *-* until the end of the row and crochet 2 dc in the last stitch of the row.
3. Row 3: ch 2 (count as a dc), dc in the same stitch; in next ch space crochet: dc, ch, dc. *In next ch space crochet: 3 dc cluster, ch, 3 dc cluster; in next ch space crochet: dc, ch, dc*; Repeat *-* 3 more times; crochet 2 dc in the next stitch not in the last stitch of the row.
4. Row 4: ch 2 (count as a dc), dc in the same stitch; in the next ch space crochet: 3 dc cluster, ch, 3 dc cluster. *In next ch space crochet: dc, ch, dc; in next ch space crochet: 3 dc cluster, ch, 3 dc cluster*. Repeat *-* until the end of the row and crochet 2 dc in the last stitch of the row.
5. Row 5: ch 2 (count as a dc), dc in the same stitch; in next ch space crochet: dc, ch, dc. *In the next ch space crochet: 3 dc cluster, ch, 3 dc cluster; in the next ch space crochet: dc, ch, dc*; Repeat *-* until the end of the row and crochet 2 dc in the last stitch of the row.
6. Row 6: ch 2 (count as a dc), dc in the same stitch; in the next ch space crochet: 3 dc cluster, ch, 3 dc cluster. *In the next ch space crochet: dc, ch, dc; in the next ch space crochet: 3 dc cluster, ch, 3 dc cluster*. Repeat *-* until the end of the row and crochet 2 dc in the last stitch of the row.

The second shoulder:
Join the yarn from the inside (from the neckline and you’ll be finishing the row at the edge of the panel) and start in a 3 dc cluster making sure you’ll have the same number of stitches as you have on the other shoulder.
1. Row 1: ch 2 (count as a dc), dc in the same stitch; in next ch space crochet: dc, ch, dc. *In next ch space crochet: 3 dc cluster, ch, 3 dc cluster; in next ch space crochet: dc, ch, dc*; Repeat *-* 3 more times; crochet 2 dc in the last stitch of the row.
2. Row 2: ch 2 (count as a dc), dc in the same stitch; in next ch space crochet: 3 dc cluster, ch, 3 dc cluster. *In next ch space crochet: dc, ch, dc; in next ch space crochet: 3 dc cluster, ch, 3 dc cluster*. Repeat *-* until the end of the row and crochet 2 dc in the last stitch of the row.
3. row: make 2 sl. st to go to the 3 dc cluster stitch of the previous row and make 2 chains (count as a dc) and 1 dc in the same stitch; in the next ch space crochet: dc, ch, dc. *In next ch space crochet: 3 dc cluster, ch, 3 dc cluster; in next ch space crochet: dc, ch, dc*; Repeat *-* 3 more times; crochet 2 dc in the last stitch of the row.
4. Row 4: ch 2 (count as a dc), dc in the same stitch; in next ch space crochet: 3 dc cluster, ch, 3 dc cluster. *In next ch space crochet: dc, ch, dc; in next ch space crochet: 3 dc cluster, ch, 3 dc cluster*. Repeat *-* until the end of the row and crochet 2 dc in the last stitch of the row.
5. Row 5: ch 2 (count as a dc), dc in the same stitch; in next ch space crochet: dc, ch, dc. *In next ch space crochet: 3 dc cluster, ch, 3 dc cluster; in next ch space crochet: dc, ch, dc*; Repeat *-* until the end of the row and crochet 2 dc in the last stitch of the row.
6. Row 6: ch 2 (count as a dc), dc in the same stitch; in next ch space crochet: 3 dc cluster, ch, 3 dc cluster. *In next ch space crochet: dc, ch, dc; in next ch space crochet: 3 dc cluster, ch, 3 dc cluster*. Repeat *-* until the end of the row and crochet 2 dc in the last stitch of the row.

The front panel:
Crochet the front panel shorter with two rows, you need to do this because you’ll crochet the shoulders with 2 rows longer.
The chart for the back (click on the photo for a better resolution):

First shoulder:
1. Row 1: ch 2 (count as a dc), dc in the same stitch; *In next ch space crochet: dc, ch, dc, in next ch space crochet: 3 dc cluster, ch, 3 dc cluster*. Repeat *-* 4 more times; crochet 2 dc in the next stitch (the next 3 dc cluster) not in the next ch space.
2. Row 2: ch 2 (count as a dc), dc in the same stitch. *In the next ch space crochet: dc, ch, dc; in the next ch space crochet: 3 dc cluster, ch, 3 dc cluster*. Repeat *-* until the end of the row and crochet 2 dc in the last stitch of the row.
3. Row 3: ch 2 (count as a dc), dc in the same stitch; in next ch space crochet: dc, ch, dc. *In the next ch space crochet: 3 dc cluster, ch, 3 dc cluster; in the next ch space crochet: dc, ch, dc*; Repeat *-* 3 more times; 2 dc in next ch space.
4. Row 4: ch 2 (count as a dc), dc in the same stitch; in next ch space crochet: 3 dc cluster, ch, 3 dc cluster. *In the next ch space crochet: dc, ch, dc; in the next ch space crochet: 3 dc cluster, ch, 3 dc cluster*. Repeat *-* until the end of the row (3 more times) and crochet 2 dc in the last stitch of the row.
5. Row 5: ch 2 (count as a dc), dc in the same stitch; in next ch space crochet: dc, ch, dc. *In next ch space crochet: 3 dc cluster, ch, 3 dc cluster; in next ch space crochet: dc, ch, dc*; Repeat *-* 3 more times; crochet 2 dc in next stitch (the next 3 dc cluster) not in the last stitch of the row.
6. Row 6: ch 2 (count as a dc), dc in the same stitch; in next ch space crochet: 3 dc cluster, ch, 3 dc cluster. *In the next ch space crochet: dc, ch, dc; in the next ch space crochet: 3 dc cluster, ch, 3 dc cluster*. Repeat *-* until the end of the row and crochet 2 dc in the last stitch of the row.
7. Row 7: ch 2 (count as a dc), dc in the same stitch; in next ch space crochet: dc, ch, dc. *In the next ch space crochet: 3 dc cluster, ch, 3 dc cluster; in the next ch space crochet: dc, ch, dc*; Repeat *-* until the end of the row and crochet 2 dc in the last stitch of the row.
8. Row 8: ch 2 (count as a dc), dc in the same stitch; in next ch space crochet: 3 dc cluster, ch, 3 dc cluster. *In next ch space crochet: dc, ch, dc; in next ch space crochet: 3 dc cluster, ch, 3 dc cluster*. Repeat *-* until the end of the row and crochet 2 dc in the last stitch of the row.

The second shoulder:
Join the yarn from the inside (from the neckline and you’ll be finishing the row at the edge of the panel) and start in a 3 dc cluster making sure you’ll have the same number of stitches as the other shoulder.
1. Row 1: ch 2 (count as a dc), dc in the same stitch; *In next ch space crochet: 3 dc cluster, ch, 3 dc cluster; in the next ch space crochet: dc, ch, dc*; Repeat *-* until the end of the row (4 more times) and crochet 2 dc in the last stitch of the row.
2. Row 2: ch 2 (count as a dc), dc in the same stitch; *In next ch space crochet: 3 dc cluster, ch, 3 dc cluster; in the next ch space crochet: dc, ch, dc*; Repeat *-* 4 more times and crochet 2 dc in the last stitch of the row.
3. Row 3: sl st until you reach the ch space and crochet 2 ch (count as a dc), dc in the same stitch; in the next ch space crochet: dc, ch, dc. *In the next ch space crochet: 3 dc cluster, ch, 3 dc cluster; in the next ch space crochet: dc, ch, dc*; Repeat *-* until the end of the row (3 more times) and crochet 2 dc in the last stitch of the row.
4. Row 4: ch 2 (count as a dc), dc in the same stitch; in next ch space crochet: 3 dc cluster, ch, 3 dc cluster. *In next ch space crochet: dc, ch, dc; in next ch space crochet: 3 dc cluster, ch, 3 dc cluster*. Repeat *-* until the end of the row (3 more times) and crochet 2 dc in the last stitch of the row.
5. Row 5: sl st until you reach the next 3 dc cluster and crochet 2 ch (count as a dc), dc in the same stitch; in the next ch space crochet: dc, ch, dc. *In the next ch space crochet: 3 dc cluster, ch, 3 dc cluster; in the next ch space crochet: dc, ch, dc*; Repeat *-* until the end of the row (3 more times) and crochet 2 dc in the last stitch of the row.
6. Row 6: ch 2 (count as a dc), dc in the same stitch; in next ch space crochet: 3 dc cluster, ch, 3 dc cluster. *In next ch space crochet: dc, ch, dc; in next ch space crochet: 3 dc cluster, ch, 3 dc cluster*. Repeat *-* until the end of the row and crochet 2 dc in the last stitch of the row.
7. Row 7: ch 2 (count as a dc), dc in the same stitch; in next ch space crochet: dc, ch, dc. *In next ch space crochet: 3 dc cluster, ch, 3 dc cluster; in next ch space crochet: dc, ch, dc*; Repeat *-* until the end of the row and crochet 2 dc in the last stitch of the row.
8. Row 8: ch 2 (count as a dc), dc in the same stitch; in next ch space crochet: 3 dc cluster, ch, 3 dc cluster. *In next ch space crochet: dc, ch, dc; in next ch space crochet: 3 dc cluster, ch, 3 dc cluster*. Repeat *-* until the end of the row and crochet 2 dc in the last stitch of the row.
Crochet a single crochet stitch all around the front panel and then around the back panel, both on the right side (in corners crochet 2 sc in one stitch). I like to crochet this round of single crochet because the edges look better and are an easy way to add stability and flatten curling pieces. In addition, it’s easier to join together the two panels. Plus the neckline looks better too, but you can skip this step if you like.
To work this single crochet edge, always insert your hook from front to back under both loops of the previous crochet stitches. Crochet this edge from the right side of the piece and from right to left. If you crochet with your left hand, reverse the direction.
Sew together the front and back panels leaving enough space for the sleeves, then sew together the shoulders. After you finish sewing together the front panel and the back panel don’t cut the yarn, use it to crochet the sleeve starting the sleeve from that point.
The sleeves for the Flower Bud crochet top:
You’ll crochet both sleeves in the same way.
Crochet the sleeves directly on the top, if you’ve crocheted the single crochet stitch edge on the front and back panel it will be much easier to crochet the sleeves. Of course, you can crochet them separately and sew them on the top.
We will crochet the sleeves in rounds, don’t panic is actually very easy!
You need to have multiple of 3 stitches, for my sleeve I have 60 stitches.
1. Round 1: ch 3 and dc in the same stitch; skip 2 stitches and crochet: 3 dc cluster, ch, 3 dc cluster in the same chain; *skip 2 stitches and crochet: dc, ch, dc in the same chain; skip 2 stitches and crochet: 3 dc cluster, ch, 3 dc cluster in the same chain;*. Repeat *-* until the end of the round. Slip stitch in the next ch space to close the round.
2. Round 2: crochet in the same ch space where you just closed the round: ch 2, 2 dc cluster, ch, 3 dc cluster. In the next ch space crochet: dc, ch, dc. And *in the next ch space crochet: 3 dc cluster, ch, 3 dc cluster; in the next ch space crochet: dc, ch, dc. *. Repeat *-* until the end of the round. Slip stitch to close the round and make another slip stitch to the next ch space to start the next round.
3. Round 3: ch 3 and dc in the same stitch. In next ch space crochet: 3 dc cluster, ch, 3 dc cluster; *In next ch space crochet: dc, ch, dc and in the next ch space crochet: 3 dc cluster, ch, 3 dc cluster*; Repeat *-* until the end of the round. Slip stitch in the next ch space to close the round, from here you’ll start the next round.
Repeat the pattern from row 2 until you have in total 7 rows, or until you reach the desired length of the sleeve, you even can crochet this top with long sleeves. Don’t cut the yarn and continue crocheting one round of single crochet stitches, then at the end of the round slip the stitch to close the round. Don’t cut the yarn and start crocheting the ribbing. Use the same half double crochet in the back loop stitch.
The ribbing:
1. Row 1: start with 11 chains and crochet the half double crochet starting with the second chain from the hook (you should have ten half double crochet stitches);
2. Row 2: ch 1 (don’t count as a stitch), hdc in back loop in each stitch of the previous row;
Repeat row 2 until you finish the ribbing.
The neckband for the Flower Bud crochet top:
1. Row 1: Start with 8 chains and crochet the half double crochet starting with the second chain from the hook (you should have seven half double crochet stitches);
2. Row 2: ch 1 (don’t count as a stitch), hdc in back loop in each stitch of the previous row;
Repeat row 2 until you finish the neckband. You can crochet the neckband directly on the top or separately and then sew it on the neckline.

The hem for the Flower Bud crochet top:
For the hem, we are using the same half double crochet in the back loop stitch as we used for the neckband and the ribbing for the sleeves.
1. Row 1: start with 16 chains and crochet the half double crochet starting with the second chain from the hook (you should have 15 half double crochet stitches);
2. Row 2: ch 1 (don’t count as a stitch), hdc in back loop in each stitch of the previous row;
Repeat row 2 until you reach the first row of the ribbing. Sew together the two sides.

Here is how you crochet the half double crochet in back loop stitch:
Start the next row with chain 1 (don’t count as stitch).
1. Yarn over the hook and insert the hook in the back loop of the stitch of the previous row.
2. Pull a loop through the back loop of the previous row.
Now you have 3 loops on the hook.
3. Yarn over again and pull the yarn through all three loops on the hook.
4. One loop remains on the hook, and you just made one half-double crochet stitch. Repeat steps 1 to 3 for the next stitches.
The empty front loop creates a ridge on the side of the work facing you. This stitch is great for crocheting the ribbing on your tops and sweaters. But it can also be used as a basic stitch for a garment. Here is the Cozy Days Vest I’ve crocheted with this stitch, it’s gorgeous and also a very fast project!
The video tutorial for the Half Double crochet in back loop stitch:
Here are my other free patterns for Tops:
I hope you enjoyed my Flower Bud crochet top and I can’t wait to see your photos with your crochet top. In particular, I’m very curious to see what color you’ll choose, I think this crochet top would look beautiful in white or even black. In case you’ll share your Flower Bud crochet top on Instagram or Facebook feel free to tag me, or you can use the hashtag #turquoisewithvanilla.
Follow my Facebook and Instagram pages to see my current projects and to see how I’m wearing the Flower Bud crochet top.
Subscribe to my YouTube channel for my video tutorials: https://www.youtube.com/channel/UCUpzoP-RDaJV1_2kvJMh5QQ/videos

*Some links may be affiliate links so this will allow me to make a small commission on any products purchased through my recommendation. This way, you help me sustain my work and help to provide free content. Please note that this does not influence my opinion or recommendations in any way.
Copyright 2021 Turquoise with vanilla. All rights reserved. This pattern is property of Julia Bleau @Turquoisewithvanilla so Please DO NOT sell the pattern and claim this pattern as your own. The pattern is for personal use only and may not be translated or reproduced in another language. Please respect my rights so DO NOT share or publish this pattern anywhere without my permission. You can sell the items made with this pattern but please credit Turquoise with vanilla as the designer.


[…] Crochet flower but top. […]
[…] Crochet flower but top. […]
[…] Crochet flower but top. […]
[…] Crochet flower but top. […]
[…] 4.Flower Bud crochet top; […]