
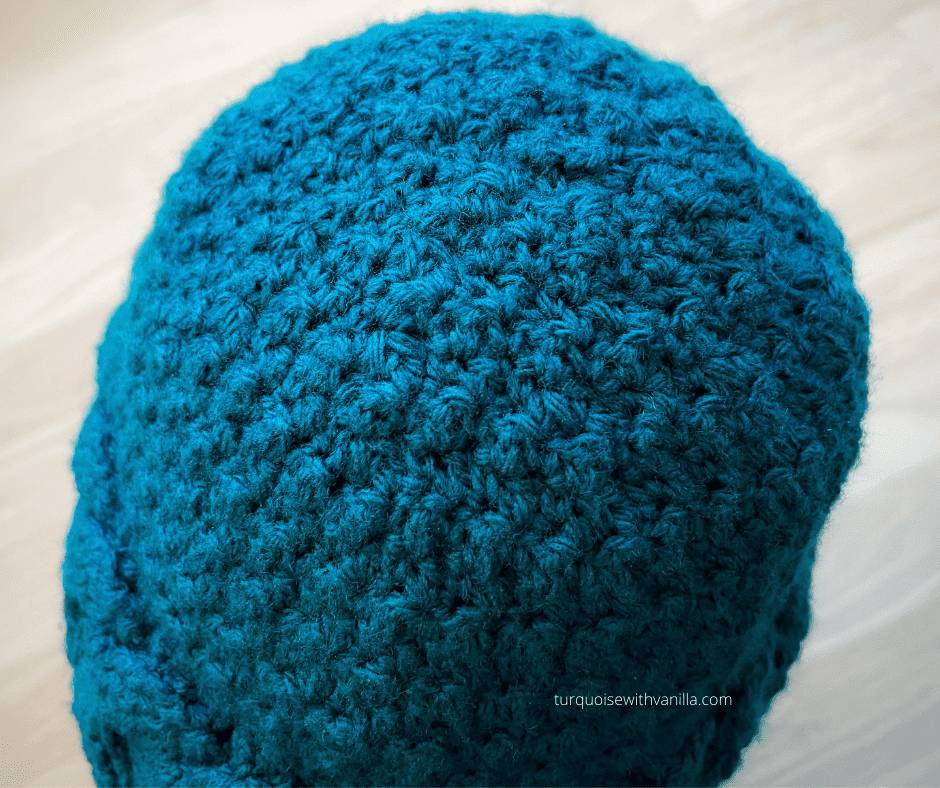
If you are looking how to crochet a beanie that is a very stylish, and comfortable hat that can easily be adjusted to fit any head the Harmony crochet beanie is the perfect pattern. The cable gives this crocheted beanie an extra texture and warmth, making the Harmony crochet beanie the perfect hat for winter days. If you are looking at how to crochet a slouchy beanie and you choose this hat, just crochet for more rounds to make it a slouchy hat.
This free pattern is very easy to crochet, the pattern uses simple stitches: the single crochet stitch, the double crochet stitch, and more complex stitches: the front post double crochet stitch and the back post double crochet stitch. All these stitches create a solid fabric with a really good drape and the result is a strong, durable fabric that is ideal for crocheting beanies, the textured pattern will hold up very well in the washing process.
The Harmony crochet beanie is the perfect crochet hat if you want to crochet a quick and simple crochet pattern. So if you are looking for how to crochet a beanie, that is textured, easy, quick to crochet, and warm for Christmas crochet gifts you definitely should try the Harmony crochet beanie.
For the Harmony Crochet beanie, you will need 100g of Classic DK(100g= 285m/ 3.53oz= 311 yards) and a 4.5 mm hook.
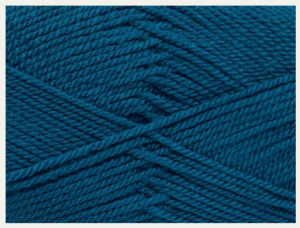 This is one of those wonderful types of yarn that is so easy to work with that it flies over the needle or hook. Is airy and has a lovely and light volume. It is produced from 100% antibacterial acrylic of very high quality, light, and soft yarn that is comfortable to work with and wear on the body.
The soft yarn is suitable for lots of creative, colorful projects. It does not scratch and is therefore great to use for blankets, sweaters, hats, scarves, etc. The airy yarn will keep you warm and won’t get too heavy.
If you’re allergic to wool, or if you want to opt out of animal fibers for other reasons, you can replace it with this 100% antibacterial acrylic for a soft and lovely result.
You can buy this great yarn HERE.
Abbreviations:
The pattern uses US crochet terminology.
ch= chain;
st= stitch;
sts= stitches;
3 sts tog= 3 stitches together;
2 sts tog= 2 stitches together;
dc= double crochet;
sl sts= slip stitches;
fpdc= front post double crochet;
bpdc= back post double crochet.

If you like to support my work as a crochet designer and support me to providing more free patterns and designs, buy me a cup of coffee:

The simplest type of crochet/knit hat, the beanie is a brimless hat that fits closely to the head. The finished circumference will be smaller than your actual head measurement, so the beanie stretches.
If this is a hat for you, give it a try on your head after a few rows, because you could crochet tighter or looser than me, you may want to make sure it’s a good fit before you finish the entire beanie.
The final dimensions of my crochet hat: circumference 51 cm/ 21 inches; hat height: 19 cm/ 7.5 inches;
Gauge for the houndstooth stitch: 18 stitches and 16 rows to 10 x 10 cm (4 x 4 inches).
The final dimensions of the Crochet Cable part: 51 cm/ 20 inches long and 8 cm/ 3 inches wide.
How to measure your head for your hat:

To measure your head for a hat, use a tape measure placed across the forehead and measure around the circumference of the head. The measuring tape should be snug to get an accurate value. To determine the hat height, place the measuring tape at the top of the crown and measure to the desired length.
First, we crochet the double crochet cable. For that you need to know how to crochet the front post double crochet stitch and the back post double crochet stitch:
How to crochet the front post double crochet stitch:
- Yarn over, insert the hook from the front around the steam of the stitch in the row below from right to left, and draw a loop through, now you have 3 loops on the hook.
- Yarn over and draw the yarn through two loops, now you have two loops on the hook.
- To finish the stitch yarn over and draw the yarn through both loops on the hook.
Repeat from step 1 to continue crocheting front post double crochet stitches.
How to crochet the back post double crochet stitch:
- Yarn over, insert the hook from the back around the steam of the stitch in the row below from right to left, and draw a loop through, now you have 3 loops on the hook.
- Yarn over and draw the yarn through two loops, now you have two loops on the hook.
- To finish the stitch Yarn over and draw the yarn through both loops on the hook.
Repeat from step 1 to continue crocheting back post double crochet stitches.
The final dimensions of my Crochet Cable: 51 cm/ 20 inches long and 8 cm/ 3 inches wide.
Feel free to wrap it around your head to ensure the size feels correct.
The pattern for the Crochet Cable:
Start with 19 chains.
1. Row 1: make a dc in the 3rd chain from the hook and continue crocheting double crochet in every chain until the end of the row.
2. Row 2: ch 2 (count as a double crochet stitch), bpdc in every stitch until the end of the row except the last stitch where you’ll crochet double crochet. You should have 18 stitches.
3. Row 3: ch 2 (count as a double crochet stitch), skip 4 stitches, and crochet fpdc in every next 4 stitches. Next crochet fpdc in every skipped stitch in the behind of the stitches you’ve just crocheted. Next, skip 4 stitches and crochet fpdc in every next 4 stitches, and continue to crochet fpdc in every skipped stitch in front of the stitches you just crocheted. Make a double crochet stitch in the last stitch of the row.
4. Row 4: ch 2 (count as a double crochet stitch), bpdc in every next stitch until the end of the row. You need to be careful how you crochet these stitches: crochet the first four bpdc in the last 4 fpdc you’ve crocheted in the previous row; the next 8 bpdc are crocheted in the stitches facing you and the last four bpdc are crocheted in the first fpdc you’ve crocheted in the previous row. Double crochet in the last stitch to finish the row.
5. Row 5: ch 2 (count as a double crochet stitch), fpdc in every stitch until the end of the row except the last stitch where you’ll crochet double crochet. You should have 18 stitches.
6. Row 6: ch 2 (count as a double crochet stitch), bpdc in every stitch until the end of the row except the last stitch where you’ll crochet double crochet. You should have 18 stitches.
Repeat the pattern from row 3 until you have the length you need. My crochet cable has 78 rows. After you finish the last row you’ll need to crochet a round of single crochet.
Please watch the video tutorial and try to crochet the cables while you are watching. In the video tutorial, you’ll see how you need to make the single crochet edge too. If it’s the first time you are making them it might seem difficult. But by practicing and being careful where every stitch goes you will see that is not that hard to crochet cables.
The video tutorial for the cable:
The chart for the cable:

After you finish crocheting the cable don’t cut the yarn and crochet single crochet stitches around the cable and then join together the two short edges crocheting single crochet through both edges. Don’t cut the yarn and crochet one more round of single crochet on the side you have the yarn. Crochet all the rounds of single crochet on the right side. Cut the yarn and start to crochet the body (rise) of the hat.
The chart for the Houndstooth stitch:

The video tutorial for the Houndstooth stitch:

The written instruction for the rise of the hat:
We are crocheting the rise of the hat on the right side of the cable, on the side with one round of single crochet. I have 82 stitches.
1. Round 1: ch 1 (don’t count as a stitch), *1 dc in the next stitch, 1 sc in the next stitch*. Repeat *-* until the end of the round, slip stitch to close the round, turn;
2. Round 2: repeat round 1 until you have 10 rounds (5.5 cm/ 2 inches just for the Houndstooth stitch).
Make sure to crochet every single crochet stitch in the double crochet of the previous row and the double crochet stitch in the single crochet of the previous row.
11. Round 11: ch 1 (don’t count as a stitch), *3 sts tog (1 dc, 1 sc, 1 dc crocheted together), 1 sc in next stitch, 1 dc in next stitch, 1 sc in next stitch, 1 dc in next stitch, 1 sc in next stitch*. Repeat *-* until the end of the round. Slip stitch to close the round, and turn; You should have 62 stitches.
12. Round 12: ch 1 (don’t count as a stitch), *1 dc in the next stitch, 1 sc in the next stitch*. Repeat *-* until the end of the round, slip stitch to close the round, turn;
13. Round 13: ch 1 (don’t count as a stitch), *3 sts tog (1 dc, 1 sc, 1 dc crocheted together), 1 sc in next stitch, 1 dc in next stitch, 1 sc in next stitch;
repeat *-* until the end of the round but for the last 2 stitches crochet 1 dc in the next stitch and 1 sc in the next stitch (the last stitch). Slip stitch to close the round, and turn; You should have 42 stitches.
14. Round 14: ch 1 (don’t count as a stitch), *1 dc in the next stitch, 1 sc in the next stitch*. Repeat *-* until the end of the round, slip stitch to close the round, turn;
15. Round 15: ch 1 (don’t count as a stitch), *3 sts tog (1 dc, 1 sc, 1 dc crocheted together), 1 sc in next stitch, 1 dc in next stitch, 1 sc in next stitch.
Repeat *-* until the end of the round; turn. You should have 28 stitches.
16. Round 16: ch 1 (don’t count as a stitch), *1 dc in the next stitch, 1 sc in the next stitch*. Repeat *-* until the end of the round, slip stitch to close the round, turn;
17. Round 17: ch 1 (don’t count as a stitch), *3 sts tog (1 dc, 1 sc, 1 dc crocheted together), 1 sc in next stitch. Repeat *-* until the end of the round; turn. You should have 14 stitches.
18. Round 18: ch 1 (don’t count as a stitch), *1 dc in the next stitch, 1 sc in the next stitch*. Repeat *-* until the end of the round, slip stitch to close the round, turn;
19. Round 19: ch 1 (don’t count as a stitch), *3 sts tog (1 dc, 1 sc, 1 dc crocheted together), crochet together the last 2 stitches. Slip stitch to close the round.
Cut the yarn and secure the last stitch. Weave in the end closing the hole if you have one.
Although it’s perfectly satisfactory to wear your hat as soon as it is finished. Blocking will smooth out the stitches and improve the look and feel of the fabric. If you plan to make several hats, you will find it easier to block most types on a head form. These are available in many online stores and are made of wood, wire, or styrofoam. You can also use an inverted bowl or a balloon to make a spherical shape for blocking a hat. Tams and berets can be blocked on a dinner plate. Hats also can be blocked flat on a blocking mat or flat surface covered by a colorfast towel.
You can wet block your hat by immersing it in lukewarm water and a little wool wash for about 20 minutes or until it is thoroughly wet. Place it on a colorfast towel and carefully press out the excess water without wringing the hat. Place the damp hat on the head form, bowl, or balloon. For a beret, place the wet hat on a dinner plate. Allow your hat to dry completely before removing it.
You can also steam block your hat after placing it on a head form, plate, or balloon. Steam it lightly with a steam iron or steamer held about 5 cm/ 2 inches above the hat. Do not press the hat or the stitches will be flattened. Acrylic and other synthetic yarns should not be steam-blocked.
Here are some great patterns to crochet this winter:
- Crochet Alpine hat;
- Cozy winter crochet hat;
- Cable crochet headband;
- Cozy Days crochet Vest;
- Trinity Scarf;
- Sunny days scarf;
- Twist Headband.

I hope you enjoyed the Harmony Crochet Beanie. Also, I can’t wait to see your photos with Harmony Crochet Beanie. Also, feel free to tag me when you share your project on Instagram or Facebook or use the hashtag #turquoisewithvanilla.
Follow my Facebook and Instagram pages to see my current projects.
Also please Subscribe to my YouTube channel for my video tutorials: https://www.youtube.com/channel/UCUpzoP-RDaJV1_2kvJMh5QQ/videos
*Some links may be affiliate links, allowing me to make a small commission on any products purchased through my recommendation. Please note that this does not influence my opinion or recommendations in any way.


