
This Granny square vest pattern it’s a fast project to crochet and very easy to crochet, the pattern only uses the single crochet stitch, the half double crochet stitch, and the double crochet stitch. This project is perfect for a beginner not only because it’s easy to crochet it but because after you see it finished you will have the feeling that you’re crochet skills are improving and you can do this!
What I love the most about this slipover crochet vest pattern is that it has minimum shaping, you only need to crochet the granny squares and then sew them together. Even if it’s an easy and fast pattern as a result you’ll have a beautiful and cozy vest for everyday wear.
Follow my Instagram page to see my latest projects.
The final dimensions of the Granny Squares Vest are 46 cm (18 inches) wide, (92 cm/ 36.2 inches circumference) and 55 cm (21.6 inches) long.
For my vest, I’ve used 250 g Dora Light Green(100 g/3.53 oz= 250m/ 273 yards) and 150 g Dora White and a 4.5 mm hook for the granny squares and a 4 mm hook for the ribbing.
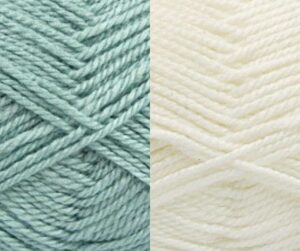
This yarn is a soft yarn with great, airy volume, suitable for crochet and knitting projects. It is produced from 100% acrylic of very high quality and comes in a huge selection of colors. Whether you knit or crochet with this yarn, the stitches will stand out nicely and clearly. If you’re allergic to wool, or if you want to opt out of animal fibers for other reasons, you can replace it with this great acrylic yarn for a soft and lovely result. The soft yarn is suitable for lots of creative, colorful projects. It does not scratch and is comfortable to work with and wear on the body. You can buy this great yarn HERE.
If you like to support my work as a crochet designer and support to providing more free patterns and designs, buy me a cup of coffee:

Abbreviations:
ch= chain;
st= stitch;
sts= stitches;
sc= single crochet;
hdc= half double crochet;
dc= double crochet;
sl sts= slip stitches;
The pattern uses US crochet terminology.

First, let’s crochet the granny square. You’ll need 20 squares: 9 for the front panel, 9 for the back panel, and 2 for the shoulders.
The pattern for the Granny Square:
The chart for the granny square:

The Video Tutorial for the Granny Square:
The written pattern for the Granny Square:
The dimensions of a granny square are 14.5 cm x 14.5 cm (5.7 inches x 5.7 inches).
Start with a magic ring:
1. Round 1: ch 2 (count as a “dc”), 2 dc, 2 ch, * 3 dc, 2 ch*, repeat *-* 3 times; finish the round with 3 sl. sts ( one to close the round and two to go in the next “2 ch” space);
2. Round 2: ch 2 (count as a “dc”), 2 dc, 2 ch, 3 dc in the same space; ch, *in next space crochet: 3 dc, 2 ch, 3 dc, ch*. Repeat *-* until the end of the round; finish the round with 3 sl. sts ( one to close the round and two to go in the next “2 ch” space);
3. Round 3: ch 2 (count as a “dc”), 4 dc in the same space, 7 dc (3 dc in the 3 dc of the previous round, 1 dc in 1 ch space, and 3 dc in the next 3 dc of previous round); *5 dc in next “2 ch space”, 7 dc (3 dc in the 3 dc of the previous round, 1 dc in 1 ch space and 3 dc in next 3 dc of previous round)*. Repeat *-* until the end of the round. Finish the round with 2 sl. sts ( one to close the round and the 2nd to go in the 3rd dc crocheted in “2 ch” space);
4. Round 4: ch 2 (count as a “dc”), 4 dc in the same space, [1 dc in next dc of the previous round, ch, *skip “1 dc” of previous round, 1 dc, 1 ch*, repeat *-* 4 times; skip 1 dc of previous round, 1 dc, 5 dc in next st]; repeat [-] 3 times. 1 dc in next dc of the previous round, ch, *skip “1 dc” of previous round, 1 dc, 1 ch*, repeat *-* 4 times; skip 1 dc of previous round, 1 dc. Finish the round with 2 sl. sts ( one to close the round and the 2nd to go in the 3rd dc crocheted in “2 ch” space);
5. Round 5: ch 2 (count as a “dc”), 4 dc in the same space, [3 dc in next “3 dc” of previous round, ch, * 1 dc, 1 ch in next “1 dc” of previous round*, repeat *-* 4 times; 3 dc in next “3 dc” of previous round, 5 dc in next st]; repeat [-] 3 times. 3 dc in next “3 dc” of previous round, ch, * 1 dc, 1 ch in next “1 dc” of previous round*, repeat *-* 4 times; 3 dc in next “3 dc” of the previous round. Finish the round with 2 sl. sts ( one to close the round and the 2nd to go in the 3rd dc crocheted in “2 ch” space);
6. Round 6: ch 2 (count as a “dc”), 4 dc in the same space, [5 dc in next “5 dc” of previous round, ch, * 1 dc, 1 ch in next “1 dc” of previous round*, repeat *-* 4 times; 5 dc in next 5 sts of previous round, 5 dc in next st]; repeat [-] 3 times. 5 dc in next “5 dc” of previous round, ch, * 1 dc, 1 ch in next “1 dc” of previous round*, repeat *-* 4 times; 5 dc in next sts. Finish the round with an sl. st.
You will begin assembling your vest flat by working all vertical seams, and then all horizontal seams. Then you’ll crochet the textured edge on the sides.
Assemble squares following the diagram below:

The front panel and the back panel have 9 granny squares each. After you sewed together the first panel and then the second panel, sew one granny square for each shoulder on the back panel and on the front panel too.
Next, we will crochet the textured edge on the left and right sides of the vest.
The textured edge of the Granny Square Vest:
Start to crochet the edge on the right side.
Row 1 (WS): ch2, crochet 1 double crochet stitch in every next stitch and 1 dc in every ch space. Crochet the double crochet sts for 2 granny squares; turn.
Row 2 (RS): ch2, crochet 1 double crochet in every next stitch to the end of the row.
After you’ve finished the second row, secure the last stitch and weave in the ends. Repeat for all 3 edges. After you’ve finished crocheting all 4 edges on the side of the vest fold the vest over and sew together the left sides and the right ones.

The sleeves:
Make two sleeves repeating the same pattern.
1. Round 1: ch 1, sc in every next stitch, skip the ch spaces, slip stitch to close the round.
2. Round 2: ch 1, sc in every next stitch, slip stitch to close the round.
3. Round 3: repeat round 2.
You will now crochet a border with a single crochet around the neckline and bottom hem of the vest. For the neckline crochet, a single crochet stitch in every next stitch, skip the ch space. For the hem crochet single crochet in every next stitch and every next ch space.
The ribbing for the collar :
1. Row 1: start with 31 chains and crochet the half double crochet starting with the second chain from the hook. You should have 30 half-double crochet stitches;
2. Row 2: ch 1 (don’t count as a stitch), hdc in back loop in each stitch of the previous row;
Repeat row 2 around the neckline until you get to the first row and sew together the edges.
Here is the detailed video tutorial for the neckband. Please watch the tutorial to see exactly how I’m crocheting it. And to see a few simple but important tips that will help you in the feature projects too. You can use the same method for the hem too.
The hem:
1. Row 1: start with 13 chains and crochet the half double crochet starting with the second chain from the hook; you should have 12 half double crochet stitches);
2. Row 2: ch 1 (don’t count as a stitch), hdc in back loop in each stitch of the previous row; you should have 12 half double crochet stitches.
Repeat row 2 around the bottom of the vest until you get to the first row and sew together the edges. Cut the yarn and weave in the ends.
I recommend washing the Granny Square Vest by hand or on the washing machine at a maximum of 30 Celsius degrees. I prefer 20 Celsius degrees for all my crocheted or knitted items. Block the vest using your favorite method.
Here is a list of my patterns for vests and tops you might enjoy as well:
- Crazy love top;
- Cherry blossom top;
- Cotton crochet top;
- Crochet wild tulips top;
- Harmony crochet vest;
- Cozy days crochet vest;

I hope you enjoyed this Granny square vest and I can’t wait to see your photos with your Granny square vest. In particular, I’m very curious to see what color you’ll choose. In case you’ll share your Granny square vest on Instagram or Facebook feel free to tag me, or you can use the hashtag #turquoisewithvanilla.
Follow my Facebook and Instagram pages to see my current projects.
Subscribe to my YouTube channel for my video tutorials: https://www.youtube.com/channel/UCUpzoP-RDaJV1_2kvJMh5QQ/videos
*Some links may be affiliate links so this will allow me to make a small commission on any products purchased through my recommendation. This way, you help me sustain my work and help to provide free content. Please note that this does not influence my opinion or recommendations in any way.
Copyright 2023 Turquoise with vanilla. All rights reserved. This pattern is the property of Julia Bleau @Turquoisewithvanilla. Please DO NOT sell the pattern and claim this pattern as your own. The pattern is for personal use only and may not be translated or reproduced in another language. Please respect my rights so DO NOT share or publish this pattern anywhere without my permission. You can sell the items made with this pattern but please credit Turquoise with vanilla as the designer.


What size hook do you use? I must have missed that. Also, is that worsted weight? Thanks!
Hello, I’ve used a 4.5 mm hook for the granny squares and a 4 mm hook for the ribbing. The yarn: 100 g/3.53 oz= 250m/ 273 yards.