
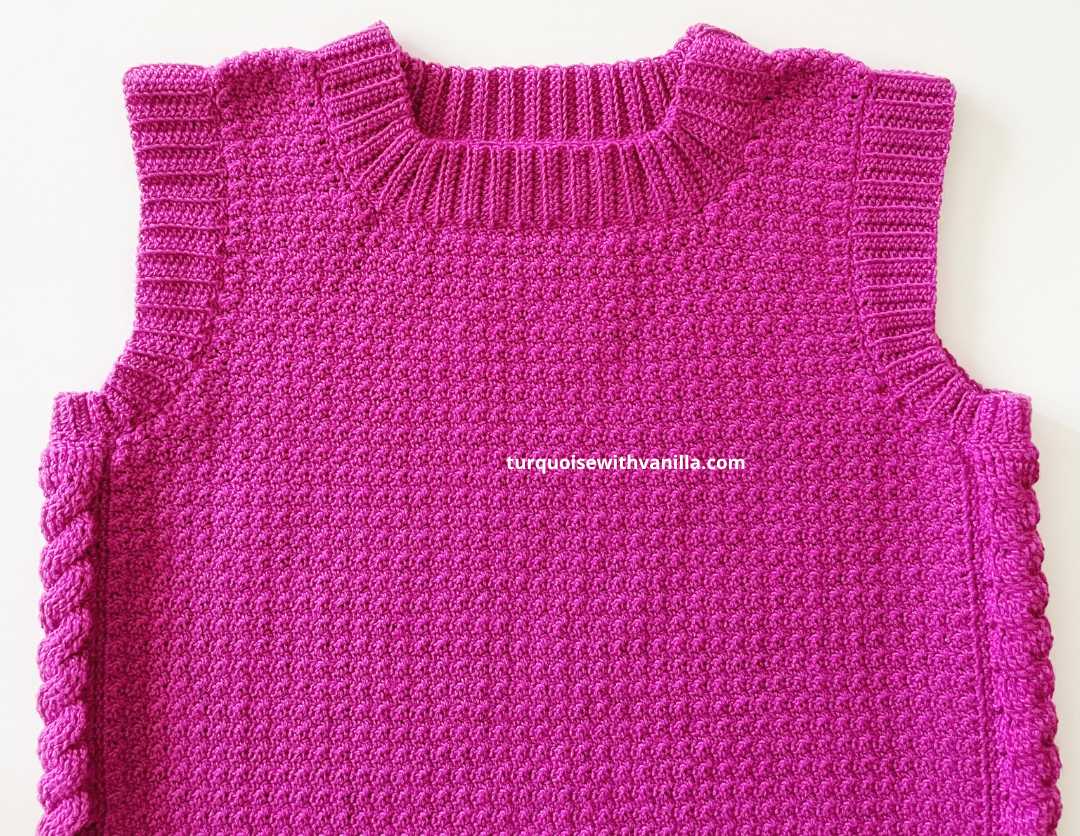
The Harmony crochet vest it’s a versatile crochet vest top and it will make a great garment for your wardrobe. It looks very stylish and the folded sleeves give a unique and elegant look. It looks very beautiful with trousers, jeans, skirts, in an office or a casual look. You can wear it in the spring or summer as a tank top or on cooler days as a vest on your favorite shirt. If you loved the Harmony crochet cardigan and the Harmony crochet long cardigan you’ll love the Harmony crochet vest.
For the Harmony crochet vest pattern, you need to know how to crochet the houndstooth stitch, the half double crochet in the back loop stitch, and the double crochet cable. The crochet houndstooth stitch combines crocheting single and double crochet stitches. Each row of alternating single crochet stitch and double crochet stitch is balanced on the following row by working singles into the top of the doubles and doubles into the top of the singles. The half double crochet in back loop stitch is the easiest stitch you can use as ribbing and besides being very easy to crochet, it looks beautiful and adds texture to the overall patterning.
Because I wanted to add something special to my pattern I crocheted the cables and added them to the sides. And I think this braided crochet stitch made the Harmony crochet top look stylish, unique, and elegant even if this simple crochet pattern uses basic stitches.
The Harmony crochet vest is not a beginner crochet pattern but is a very fun project to make. So don’t give up if it doesn’t look good the first time, or the second, we all have been there! Just take the crochet and practice every day if you can and you’ll become so good that even you won’t believe it! You can do it and you can be good at it!
Follow my Instagram page to see how I wear my Harmony crochet vest.
For my Harmony crochet vest, I’ve used 300g Lorena Bamboo Orchid (50g= 150m/ 1.76oz= 164 yards) and a 3.5 mm hook.
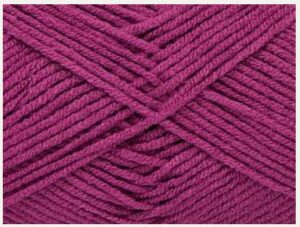
This yarn is 50% bamboo and 50% acrylic which makes the yarn very soft and gives it a special light weighted feel. It is pleasant on the skin and is therefore also a very child-friendly yarn. The bamboo’s fibers are naturally silky soft and smooth – which makes the yarn incredibly delicate. The texture and silk-like properties give crocheted or knitted projects a beautiful drape. The acrylic helps to hold the soft bamboo fibers together and give the yarn good shape and texture. The yarn applies to all types of knitting and crocheting, also you will love it for baby things, wraps, blankets, and shawls.
The color chart includes plenty of gorgeous colors, you just have to decide what color you like and get started. You can buy this yarn HERE.
Bamboo and the environment – bamboo is the fastest-growing plant in the world and is therefore a fantastic source of sustainable production. Bamboo releases more oxygen than any other plant and grows without the use of pesticides.
The final dimensions of the Harmony crochet vest: are 45 cm/ 17.7 inches in width (90 cm/ 35.4 inches circumference) and 56 cm/ 22 inches long.
Gauge for the houndstooth stitch: 23 stitches and 21 rows to 10 x 10 cm (4 x 4 inches).
ABBREVIATIONS:
ch= chain;
st= stitch;
sc= single crochet;
hdc= half double crochet;
dc= double crochet;
fpdc= front post double crochet;
bpdc= back post double crochet.
sl st= slip stitch;
The pattern uses US crochet terminology.
If you like to support my work as a crochet designer and support me to providing more free patterns and designs, buy me a cup of coffee:

How to crochet the double crochet cable.
For the Harmony crochet vest, you need to crochet two cables, my cables are 32 cm/ 12.6 inches long and 6 cm/ 2.3 inches wide.
So, when you calculate the dimensions of your crochet vest don’t forget about the cables, these add an extra 6 cm/ 2.3 inches each in width.
Please, watch the video tutorial and if it’s the first time when you are crocheting cables you can start crocheting the cables while you are watching the tutorial:
Start with 19 chains.
1. Row 1: make a dc in the 3rd chain from the hook and continue crocheting double crochet in every chain until the end of the row.
2. Row 2: ch 2 (count as a double crochet stitch), bpdc in every stitch until the end of the row except the last stitch where you’ll crochet double crochet. You should have 18 stitches.
3. Row 3: ch 2 (count as a double crochet stitch), skip 4 stitches, and crochet fpdc in every next 4 stitches. Next crochet fpdc in every skipped stitch in the behind of the stitches you’ve just crocheted. Next, skip 4 stitches and crochet fpdc in every next 4 stitches and continue to crochet fpdc in every skipped stitch in front of the stitches you just crocheted. Make a double crochet stitch in the last stitch of the row.
4. Row 4: ch 2 (count as a double crochet stitch), bpdc in every next stitch until the end of the row. You need to be careful how you crochet these stitches: crochet the first four bpdc in the last 4 fpdc you’ve crocheted in the previous row; the next 8 bpdc are crocheted in the stitches facing you and the last four bpdc are crocheted in the first fpdc you’ve crocheted in the previous row. Double crochet in the last stitch to finish the row.
5. Row 5: ch 2 (count as a double crochet stitch), fpdc in every stitch until the end of the row except the last stitch where you’ll crochet double crochet. You should have 18 stitches.
6. Row 6: ch 2 (count as a double crochet stitch), bpdc in every stitch until the end of the row except the last stitch where you’ll crochet double crochet. You should have 18 stitches.
Repeat the pattern from row 3. After you finish the last row you’ll need to crochet a round of single crochet. You can skip this step. But it’s better to do it because the edges of the cables will look better and it will be easier to sew them together with the back and front panels. Please watch the video tutorial and try to crochet the cables while you are watching. In the video tutorial, you’ll see how you need to make the single crochet edge too. If it’s the first time you are making them it might seem difficult. But by practicing and being careful where every stitch goes you will see that is not that hard to crochet cables.

The written instructions for the Houndstooth stitch:
Start with an odd number of chains.
Row 1: In the 2nd chain from the hook crochet double crochet then make a single crochet in the next chain, *double crochet in the next chain, single crochet in the next chain*, repeat *-* until the end of the row;
Row 2: Chain 1, double crochet in the single crochet of the previous row, single crochet in the double crochet of the previous row, *double crochet in the next single crochet of the previous row, single crochet in the next double crochet of the previous row*. Repeat *-* until the end of the row.
Make sure to crochet every single crochet stitch in the double crochet of the previous row and the double crochet stitch in the single crochet of the previous row.
Repeat row 2 to complete the pattern.
The chart for the Houndstooth stitch:

The video tutorial for the Houndstooth stitch:
The back panel of the Harmony crochet vest:

The written instruction:
Start with 87 chains:
Row 1: In the 2nd chain from the hook crochet a double crochet stitch then crochet a single crochet stitch in the next chain, *double crochet stitch in the next chain, single crochet stitch in the next chain*, repeat *-* until the end of the row. You should have 86 stitches.
Row 2: Chain 1,*double crochet stitch in next single crochet stitch of the previous row, single crochet stitch in next double crochet stitch of the previous row*. Repeat *-* until the end of the row.
Make sure to crochet every single crochet stitch in the double crochet of the previous row and the double crochet stitch in the single crochet of the previous row.
Repeat row 2 until you have 66 rows and continue to crochet the armholes neckline and shoulders.
The armholes:
The chart (click on the photo for a better resolution):

The written instructions:
67. Row 67: Chain 1, *double crochet in the single crochet of the previous row, single crochet in the double crochet of the previous row*. Repeat *-* to the last 4 stitches and turn. You should have 82 stitches.
68. Row 68: repeat row 68. You should have 78 stitches.
69. Row 69: Chain 1, *double crochet in the single crochet of the previous row, single crochet in the double crochet of the previous row*. Repeat *-* to the last 2 stitches and turn. You should have 76 stitches.
70. Row 70: repeat row 69. You should have 74 stitches.
71. Row 71: repeat row 69. You should have 72 stitches.
72. Row 72: repeat row 69. You should have 70 stitches.
73. Row 73: repeat row 69. You should have 68 stitches.
74. Row 74: repeat row 69. You should have 66 stitches.
75-94. Row 75- 94: Chain 1, *double crochet in the single crochet of the previous row, single crochet in the double crochet of the previous row. Repeat *-* until the end of the row and turn. You should have 66 stitches for each row.
The neckline and the shoulders:
95. Row 95: Chain 1, *double crochet in the single crochet of the previous row, single crochet in the double crochet of the previous row*. Repeat *-* until you have 14 stitches and turn for the next row.
96. Row 96: Chain 1, *double crochet in the single crochet of the previous row, single crochet in the double crochet of the previous row. Repeat *-* until the end of the row and turn. You should have 14 stitches.
97. Row 97: Chain 1, *double crochet in the single crochet of the previous row, single crochet in the double crochet of the previous row*. Repeat *-* until you have 12 stitches and turn for the next row.
98. Row 98: Chain 1, *double crochet in the single crochet of the previous row, single crochet in the double crochet of the previous row. Repeat *-* until the end of the row and turn. You should have 12 stitches.
99. Row 99: Chain 1, *double crochet in the single crochet of the previous row, single crochet in the double crochet of the previous row*. Repeat *-* until you have 10 stitches and turn for the next row.
100. Row 100: Chain 1, *double crochet in the single crochet of the previous row, single crochet in the double crochet of the previous row. Repeat *-* until the end of the row and turn. You should have 10 stitches.
101-104. Row 101-104: Chain 1, *double crochet in the single crochet of the previous row, single crochet in the double crochet of the previous row. Repeat *-* until the end of the row and turn. You should have 10 stitches for each row.
Crochet the second shoulder exactly like the first one. But starting the first row from the inside of the neckline (see the chart).
Crochet single crochet stitches all around the front panel and then around the back panel. Crochet the stitches on the right side (in corners crochet 2 sc in one stitch). I like to crochet this round of single crochet because the edges look better. In addition, it’s easier to join together the two panels. Plus the neckline looks better too, and it will be easier to pick up the stitches for the collar and for the sleeves too. But you can skip this step if you like.
The front panel of the Harmony crochet vest:
The written instructions for the front panel:
Start with 87 chains:
Row 1: In the 2nd chain from the hook crochet a double crochet stitch then crochet a single crochet stitch in the next chain, *double crochet stitch in the next chain, single crochet stitch in the next chain*, repeat *-* until the end of the row. You should have 86 stitches.
Row 2: Chain 1, double crochet stitch in the single crochet stitch of the previous row, single crochet stitch in the double crochet stitch of the previous row, *double crochet stitch in next single crochet stitch of the previous row, single crochet stitch in next double crochet stitch of the previous row*. Repeat *-* until the end of the row.
Make sure to crochet every single crochet stitch in the double crochet of the previous row and the double crochet stitch in the single crochet of the previous row.
Repeat row 2 until you have 66 rows and continue to crochet the armholes neckline and shoulders.
The armholes:
The chart (click on the photo for a better resolution):

The written instructions:
67. Row 67: Chain 1, *double crochet in the single crochet of the previous row, single crochet in the double crochet of the previous row*. Repeat *-* to the last 4 stitches and turn. You should have 82 stitches.
68. Row 68: repeat row 68. You should have 78 stitches.
69. Row 69: Chain 1, *double crochet in the single crochet of the previous row, single crochet in the double crochet of the previous row*. Repeat *-* to the last 2 stitches and turn. You should have 76 stitches.
70. Row 70: repeat row 69. You should have 74 stitches.
71. Row 71: repeat row 69. You should have 72 stitches.
72. Row 72: repeat row 69. You should have 70 stitches.
73. Row 73: repeat row 69. You should have 68 stitches.
74. Row 74: repeat row 69. You should have 66 stitches.
75-86. Row 75- 86: Chain 1, *double crochet in the single crochet of the previous row, single crochet in the double crochet of the previous row. Repeat *-* until the end of the row and turn. You should have 66 stitches for each row.
The neckline and the shoulders:
87. Row 87: Chain 1, *double crochet in the single crochet of the previous row, single crochet in the double crochet of the previous row*. Repeat *-* until you have 14 stitches and turn for the next row.
88. Row 88: Chain 1, *double crochet in the single crochet of the previous row, single crochet in the double crochet of the previous row. Repeat *-* until the end of the row and turn. You should have 14 stitches.
89. Row 89: Chain 1, *double crochet in the single crochet of the previous row, single crochet in the double crochet of the previous row*. Repeat *-* until you have 12 stitches and turn for the next row.
90. Row 90: Chain 1, *double crochet in the single crochet of the previous row, single crochet in the double crochet of the previous row. Repeat *-* until the end of the row and turn. You should have 12 stitches.
91. Row 91: Chain 1, *double crochet in the single crochet of the previous row, single crochet in the double crochet of the previous row*. Repeat *-* until you have 10 stitches and turn for the next row.
92. Row 92: Chain 1, *double crochet in the single crochet of the previous row, single crochet in the double crochet of the previous row. Repeat *-* until the end of the row and turn. You should have 10 stitches.
93-104. Row 93-104: Chain 1, *double crochet in the single crochet of the previous row, single crochet in the double crochet of the previous row. Repeat *-* until the end of the row and turn. You should have 10 stitches for each row.
Crochet the second shoulder exactly like the first one. But starting the first row from the inside of the neckline (see the chart).
Crochet single crochet stitches all around the front panel.
Sew together the cables on the back panel sides, the cables go underarms. Then sew together the front panel on the other side of the cables. Sew together the shoulders too.
The sleeves:
Make two sleeves repeating the same pattern.
After you’ve sewed together the panels with the double crochet cables you can start to crochet the sleeves directly on the cardigan.
I’ve started to crochet the sleeve from the middle of the cable (in the 8th stitch of the cable) and I’ve crocheted around the armhole until I’ve got to the first row and sewed together the edges.
Start with 6 chains.
Row 1: hdc in 2nd chain from the hook, continue to crochet hdc in every next chain until the end of the row. You should have 5 stitches.
Row 2: ch 1 (don’t count as a stitch), hdc in the back loop of every next stitch until the end of the row. You should have 5 stitches.
3-6. Row 3-6: Repeat row 2.
7. Row 7: 2 hdc in the back loop of the first stitch, hdc in the back loop of every next stitch until the end of the row. You should have 6 stitches.
8. Row 8: ch 1 (don’t count as a stitch), hdc in the back loop of every next stitch until the end of the row. You should have 6 stitches.
9. Row 9: 2 hdc in the back loop of the first stitch, hdc in the back loop of every next stitch until the end of the row. You should have 7 stitches.
10. Row 10: ch 1 (don’t count as a stitch), hdc in the back loop of every next stitch until the end of the row. You should have 7 stitches.
11. Row 11: 2 hdc in the back loop of the first stitch, hdc in the back loop of every next stitch until the end of the row. You should have 8 stitches.
12. Row 12: ch 1 (don’t count as a stitch), hdc in the back loop of every next stitch until the end of the row. You should have 8 stitches.
13. Row 13: 2 hdc in the back loop of the first stitch, hdc in the back loop of every next stitch until the end of the row. You should have 9 stitches.
14. Row 14: ch 1 (don’t count as a stitch), hdc in the back loop of every next stitch until the end of the row. You should have 9 stitches.
15. Row 15: 2 hdc in the back loop of the first stitch, hdc in the back loop of every next stitch until the end of the row. You should have 10 stitches.
16. Row 16: ch 1 (don’t count as a stitch), hdc in the back loop of every next stitch until the end of the row. You should have 10 stitches.
17-30. Row 17-30: ch 1 (don’t count as a stitch), hdc in the back loop of every next stitch until the end of the row. You should have 10 stitches for each row.
31. Row 31: for the first 2 stitches crochet 2 hdc tog, hdc in the back loop of every next stitch until the end of the row. You should have 9 stitches.
32. Row 32: ch 1 (don’t count as a stitch), hdc in the back loop of every next stitch until the end of the row. You should have 9 stitches.
33. Row 33: for the first 2 stitches crochet 2 hdc tog, hdc in the back loop of every next stitch until the end of the row. You should have 8 stitches.
34. Row 34: ch 1 (don’t count as a stitch), hdc in the back loop of every next stitch until the end of the row. You should have 8 stitches.
35. Row 35: for the first 2 stitches crochet 2 hdc tog, hdc in the back loop of every next stitch until the end of the row. You should have 7 stitches.
36. Row 36: ch 1 (don’t count as a stitch), hdc in the back loop of every next stitch until the end of the row. You should have 7 stitches.
37. Row 37: for the first 2 stitches crochet 2 hdc tog, hdc in the back loop of every next stitch until the end of the row. You should have 6 stitches.
38. Row 38: ch 1 (don’t count as a stitch), hdc in the back loop of every next stitch until the end of the row. You should have 6 stitches.
39. Row 39: for the first 2 stitches crochet 2 hdc tog, hdc in the back loop of every next stitch until the end of the row. You should have 5 stitches.
40. Row 40: ch 1 (don’t count as a stitch), hdc in the back loop of every next stitch until the end of the row. You should have 5 stitches.
41-48. Row 41-48. ch 1 (don’t count as a stitch), hdc in the back loop of every next stitch until the end of the row. You should have 5 stitches for each row.
Secure the last stitch, cut the yarn in a long tail, and sew together the edges of the sleeves. Weave in the ends.

The ribbing for the collar (the neckband):
1. Row 1: start with 11 chains and crochet the half double crochet starting with the second chain from the hook. You should have ten half double crochet stitches;
2. Row 2: ch 1 (don’t count as a stitch), hdc in back loop in each stitch of the previous row;
Repeat row 2 around the neckline until you get to the first row and sew together the edges.
Here is the detailed video tutorial for the neckband. Please watch the tutorial to see exactly how I’m crocheting it. And to see a few simple but important tips that will help you in the feature projects too. You can use the same method for the hem too.
The hem:
1. Row 1: start with 16 chains and crochet the half double crochet starting with the second chain from the hook; you should have 15 half double crochet stitches);
2. Row 2: ch 1 (don’t count as a stitch), hdc in back loop in each stitch of the previous row; you should have 15 half double crochet stitches.
Repeat row 2 around the bottom of the top until you get to the first row and sew together the edges.

Here is a list of my patterns for sweaters and tops you might enjoy as well:
Crazy love top;
Cherry blossom top;
Cotton crochet top;
Crochet wild tulips top;
Crochet flower but top.
Cotton crochet sweater;
I hope you enjoyed the Harmony crochet vest. Also, I can’t wait to see your photos with the Harmony crochet vest. Also, feel free to tag me when you share your project on Instagram or Facebook, or you can use the hashtag #turquoisewithvanilla.
Follow my Facebook and Instagram pages to see my current projects.
Also please Subscribe to my YouTube channel for my video tutorials: https://www.youtube.com/channel/UCUpzoP-RDaJV1_2kvJMh5QQ/videos
*Some links may be affiliate links, allowing me to make a small commission on any products purchased through my recommendation. Please note that this does not influence my opinion or recommendations in any way.


[…] Harmony crochet vest; […]
[…] Harmony crochet vest; […]